はじめに
どうも、土鍋です。
今回はBluetoothデバイスとUnity間で通信を行ってみました。
ただ、UnityでのBluetoothに関してはOS固有の問題が多く、そのままのUnity上だけでBLEを完結させることはできませんでした。これに関しては様々記事を探しましたが今まで完璧にスマートな解決しているものがないので、現状はないのだと思います。
モバイル向けには以下のようなアセットがありました。
Bluetooth LE for iOS, tvOS and Android | ネットワーク | Unity Asset Store
で、今回はどのように解決したかと言いますと、
単純にPythonでBLE用のコードを動かし、UnityとローカルでTCPして送る形にしました。 まるで解決してないじゃないかではありますが、まあいったんこれでいこうということになりました。
なので、Unityで書いたのはTCP部分だけなので、この記事はほとんどnRF52とWindows間のBLEに関する解説がほとんどです。
コードは半分くらいChatGPTで、動かなかった部分を一部修正を加えて動くようにしました。
ペリフェラル
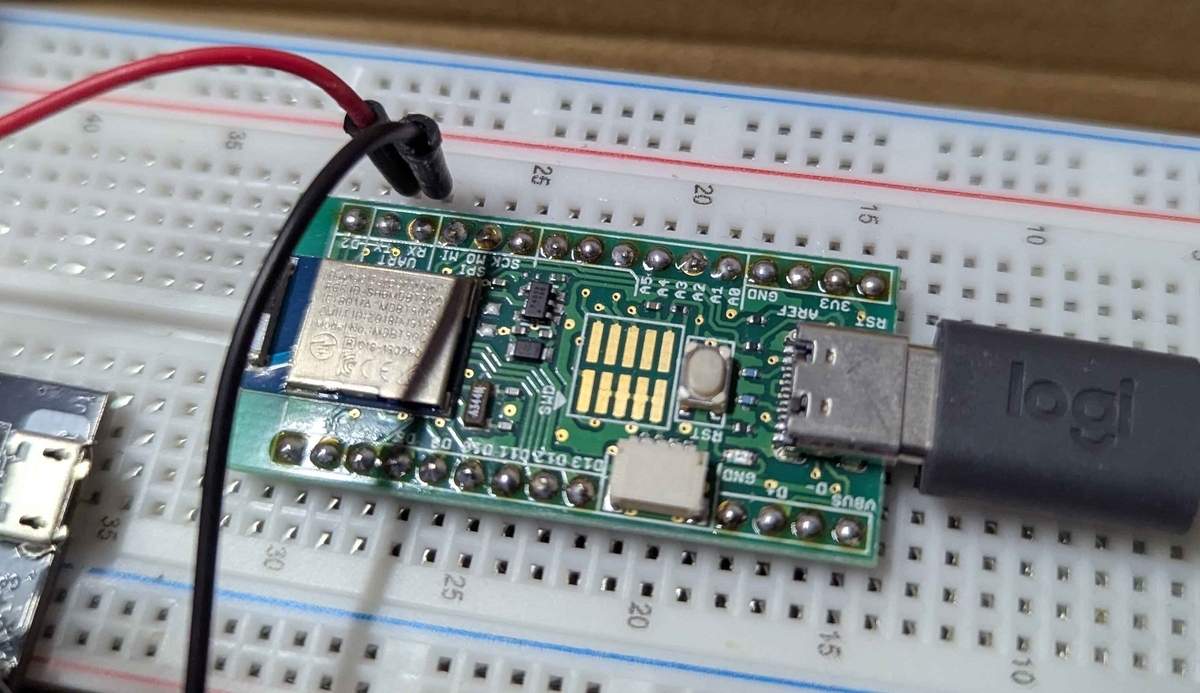
Bluetooth搭載マイコン
BLE通信にはBlutooth対応SoC「nRF52840」を搭載したマイコンを使用しました。

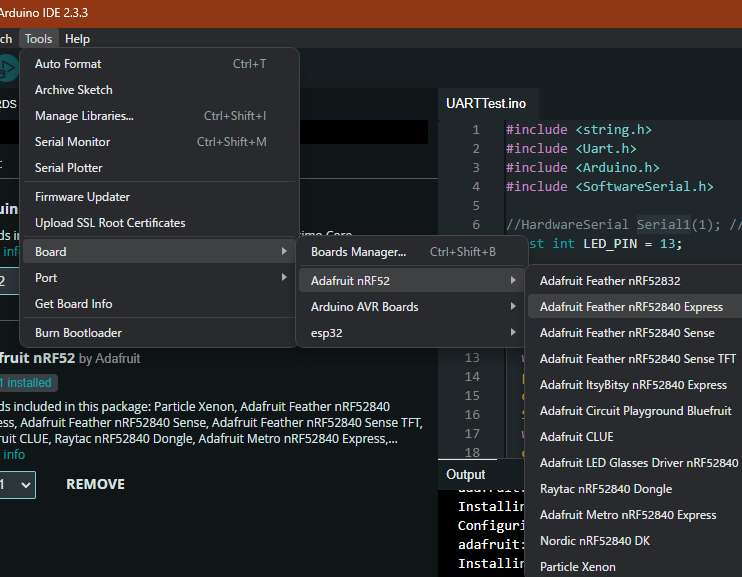
このマイコンはAdafruit nRF52 Bootloaderが組み込まれているのでArduinoIDEにて開発が可能です。
ボードマネージャーの追加
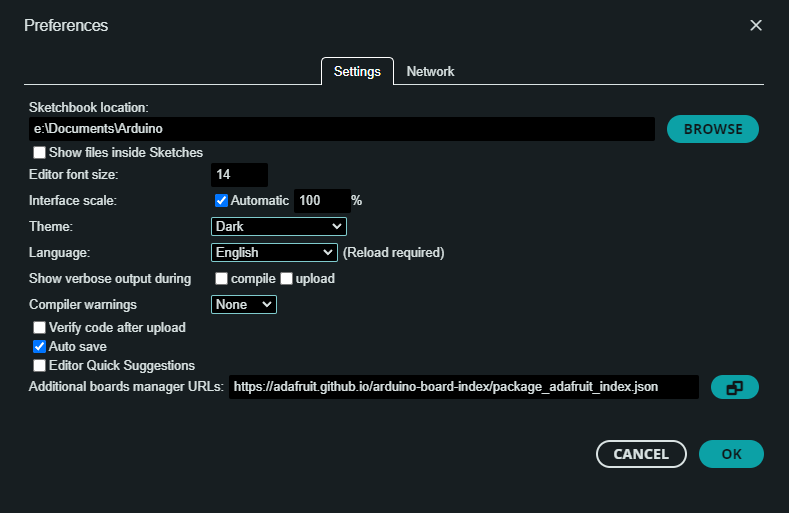
ArduinoIDEのAdafruit nRF52アドオン追加用URLが最近変更されたようなのでここにメモっときます。
https://adafruit.github.io/arduino-board-index/package_adafruit_index.json
これをPreferencesのAdditional Boards Manager URLsに追加してください。

これによってnRF52のボードに書き込めるようになります。

コード
テスト用に1秒おきに「Hello」というメッセージを飛ばすだけのコードです。
#include <Arduino.h>
#include <bluefruit.h>

// Define UUID
#define USER_SERVICE_UUID " 生成したUUID "
#define WRITE_CHARACTERISTIC_UUID " 生成したUUID "
#define NOTIFY_CHARACTERISTIC_UUID " 生成したUUID "

#define DEVICE_NAME " BLEデバイス "

// BLE Service and Characteristics
BLEService userService = BLEService(USER_SERVICE_UUID);
BLECharacteristic notifyChar = BLECharacteristic(NOTIFY_CHARACTERISTIC_UUID);

// Connection handle for notifications
uint16_t connectionHandle = BLE_CONN_HANDLE_INVALID;

void connectionCallback(uint16_t conn_handle) {
    connectionHandle = conn_handle; // Save connection handle
    Serial.println("Connected");
}

void disconnectionCallback(uint16_t conn_handle, uint8_t reason) {
    connectionHandle = BLE_CONN_HANDLE_INVALID; // Invalidate connection handle
    Serial.println("Disconnected");
    Bluefruit.Advertising.start(); // Restart advertising
}

void sendHello() {
    if (connectionHandle != BLE_CONN_HANDLE_INVALID) {
        const char* message = "Hello";
        notifyChar.notify(connectionHandle, (uint8_t*)message, strlen(message));
        Serial.println("Sent: Hello");
    }
}

void setup() {
  Serial.begin(115200);
  while ( !Serial ) delay(10);
  Serial.println("Start BLE Test");

  // Initialize serial and BLE
  Bluefruit.begin();
  Bluefruit.setTxPower(4);

  // Set BLE device name
  Bluefruit.setName(DEVICE_NAME);

  // Initialize the service and characteristics
  userService.begin();

  notifyChar.setProperties(CHR_PROPS_NOTIFY);
  notifyChar.setPermission(SECMODE_OPEN, SECMODE_NO_ACCESS);
  notifyChar.begin();

  // Set connection and disconnection callbacks
  Bluefruit.Periph.setConnectCallback(connectionCallback);
  Bluefruit.Periph.setDisconnectCallback(disconnectionCallback);

  // Start advertising
  Bluefruit.Advertising.addFlags(BLE_GAP_ADV_FLAGS_LE_ONLY_GENERAL_DISC_MODE);
  Bluefruit.Advertising.addTxPower();
  Bluefruit.Advertising.addName();

  Bluefruit.Advertising.addService(userService);

  Bluefruit.Advertising.restartOnDisconnect(true);
  Bluefruit.Advertising.setInterval(32, 244);
  Bluefruit.Advertising.start();
  Bluefruit.Advertising.setFastTimeout(30);

  Serial.println("BLE device is ready and advertising!");
}

void loop() {
  static unsigned long lastSendTime = 0;
  unsigned long currentTime = millis();

  // Check if 1 second has passed
  if (currentTime - lastSendTime >= 1000) {
      lastSendTime = currentTime;
      sendHello(); // Send "Hello" notification
  }
}
解説
BLEの準備
UUIDの生成は以下のようなサイトやそれぞれの環境で生成することでゲットしてください。
BLEService userService = BLEService(USER_SERVICE_UUID);
BLECharacteristic writeChar = BLECharacteristic(WRITE_CHARACTERISTIC_UUID);
BLECharacteristic notifyChar = BLECharacteristic(NOTIFY_CHARACTERISTIC_UUID);
この部分でServiceとCharacteristicにUUIDを登録しています。
Characteristicの設定
userService.begin();
setProperties
setProperties(CHR_PROPS_WRITE)
CharacteristicのプロパティをWriteに設定します
setProperties(CHR_PROPS_NOTIFY)
CharacteristicのプロパティをNotifyに設定します
setPermission
setPermission(SECMODE_OPEN, SECMODE_NO_ACCESS)
1つ目の引数がReadの権限で、2つ目の引数がWriteの権限です。
callbackの設定
Bluefruit.Periph.setConnectCallback → 接続時のコールバックの設定
Bluefruit.Periph.setDisconnectCallback → 切断時のコールバックの設定
advertising
addFlags(BLE_GAP_ADV_FLAGS_LE_ONLY_GENERAL_DISC_MODE);
常時、アドバタイジングパケットを発信するモードです。
セントラル
BLEデバイス見つけて、メッセージを受け取るWindows側のコードです。
Bleakのインストール
PythonのBLE通信にはBleakというライブラリを使用するのが良さそうです。 pipコマンドでインストールを行ってください。
pip install bleak
コード
Blutoothデバイスのスキャンを行って、目的のデバイスを見つけたら接続を開始します。
import asyncio
import socket
from bleak import BleakClient, BleakScanner

# BLE UUIDs
USER_SERVICE_UUID = " 生成したUUID "
NOTIFY_CHARACTERISTIC_UUID = " 生成したUUID "
DEVICE_NAME = " BLEデバイス "

# TCP settings
TCP_HOST = "127.0.0.1"  # Unity側で待機するIPアドレス (ローカルホスト)
TCP_PORT = 12345         # Unityで設定するポート番号

# Global TCP connection
tcp_client = None

# Callback for BLE notifications
def notification_handler(sender, data):
    message = data.decode("utf-8")
    print(f"Received from BLE: {message}")

    # Send data to Unity via TCP
    if tcp_client:
        try:
            tcp_client.sendall(message.encode("utf-8"))
            print(f"Sent to Unity: {message}")
        except Exception as e:
            print(f"Error sending data to Unity: {e}")

async def main():
    # Set up TCP connection to Unity
    global tcp_client
    try:
        tcp_client = socket.socket(socket.AF_INET, socket.SOCK_STREAM)
        tcp_client.connect((TCP_HOST, TCP_PORT))
        print(f"Connected to Unity at {TCP_HOST}:{TCP_PORT}")
    except Exception as e:
        print(f"Failed to connect to Unity: {e}")
        return

    # Scan for BLE devices
    print("Scanning for BLE devices...")
    devices = await BleakScanner.discover()
    target_device = None

    for device in devices:
        print(f"Found device: {device.name} - {device.address}")
        if device.name == DEVICE_NAME:
            target_device = device
            break

    if not target_device:
        print(f"Device {DEVICE_NAME} not found. Exiting.")
        return

    print(f"Connecting to {DEVICE_NAME} ({target_device.address})...")

    async with BleakClient(target_device.address) as client:
        # Wait for services to load
        services = await client.get_services()

        # Debug: Print all services and characteristics
        print("Available services and characteristics:")
        for service in services:
            print(f"- Service: {service.uuid}")
            for char in service.characteristics:
                print(f"  - Characteristic: {char.uuid}")

        # Check if the target service and characteristic are available
        if USER_SERVICE_UUID not in [s.uuid for s in services]:
            print(f"Service {USER_SERVICE_UUID} not found on the device.")
            return

        if NOTIFY_CHARACTERISTIC_UUID not in [c.uuid for s in services for c in s.characteristics]:
            print(f"Characteristic {NOTIFY_CHARACTERISTIC_UUID} not found on the device.")
            return

        print(f"Connected to {DEVICE_NAME}. Subscribing to notifications...")

        # Set notification callback
        await client.start_notify(NOTIFY_CHARACTERISTIC_UUID, notification_handler)

        print("Listening for notifications. Press Ctrl+C to exit.")
        try:
            while True:
                await asyncio.sleep(1)
        except KeyboardInterrupt:
            print("Stopping notifications...")
            await client.stop_notify(NOTIFY_CHARACTERISTIC_UUID)
            print("Disconnected.")
        finally:
            tcp_client.close()

if __name__ == "__main__":
    asyncio.run(main())
解説
スキャン
BleakScanner.discover() でBLEデバイスのスキャンを行って、接続するデバイスを探します。
接続するServiceとCharacteristicを探す
client.get_services() でサービスを取得します。
service.characteristics でそのServiceのCharacteristicを取得できます。
Notifyを待つ
client.start_notify(UUID, 実行するメソッド) でデバイスからNotifyが送られてくるのを待ちます。
Unityでメッセージを受け取る
こちらは単純にTCPサーバーを立てているだけです
コード
using System;
using System.Net;
using System.Net.Sockets;
using System.Text;
using UnityEngine;

public class TCPTest : MonoBehaviour
{
    private TcpListener server;
    private bool isRunning = true;

    void Start()
    {
        StartServer();
    }

    void OnDisable()
    {
        isRunning = false;
        server?.Stop();
    }

    void StartServer()
    {
        try
        {
            server = new TcpListener(IPAddress.Any, 12345); // ポート12345で待ち受け
            server.Start();
            Debug.Log("Server started");

            server.BeginAcceptTcpClient(OnClientConnected, null);
        }
        catch (Exception ex)
        {
            Debug.LogError($"Error starting server: {ex.Message}");
        }
    }

    void OnClientConnected(IAsyncResult result)
    {
        if (!isRunning) return;

        TcpClient client = server.EndAcceptTcpClient(result);
        Debug.Log("Client connected");

        server.BeginAcceptTcpClient(OnClientConnected, null);

        // 非同期でデータ受信を開始
        NetworkStream stream = client.GetStream();
        byte[] buffer = new byte[1024];
        stream.BeginRead(buffer, 0, buffer.Length, OnDataReceived, new Tuple<NetworkStream, byte[]>(stream, buffer));
    }

    void OnDataReceived(IAsyncResult result)
    {
        var state = (Tuple<NetworkStream, byte[]>)result.AsyncState;
        NetworkStream stream = state.Item1;
        byte[] buffer = state.Item2;

        int bytesRead = stream.EndRead(result);
        if (bytesRead > 0)
        {
            string message = Encoding.UTF8.GetString(buffer, 0, bytesRead);
            Debug.Log($"Received: {message}");

            // 再度データ受信を待機
            stream.BeginRead(buffer, 0, buffer.Length, OnDataReceived, state);
        }
        else
        {
            stream.Close();
        }
    }
}
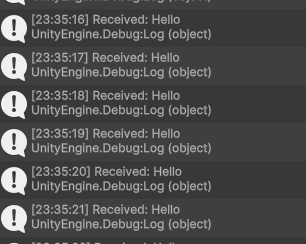
Unityにメッセージが来た!

まとめ
うーん。本当はHololens上とかQuest上のアプリケーションでやりたいからUnityで全部書きたいんだよなぁ…
NuGet For UnityでPureC#のWindows.Devices使えるんじゃね!?って思ったんですが、だめだったので、今回の手法に落ち着きました。
どなたかUnityで完結する書き方があったらご教授いただきたいです。